✨ This article was AI edited. Editorial responsibility: 3D-P.eu.
Produced with AI. This article was artificially generated. Editorial responsibility: 3D-P.eu.
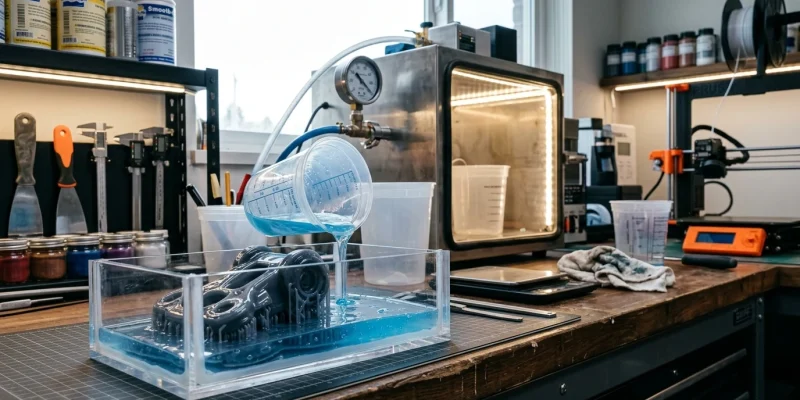
Silicon mould tools for 3D printing refer to the dedicated equipment, chemical release agents, degassing chambers, and containment mould boxes used to cast room-temperature vulcanizing (RTV) silicone around 3D printed master patterns. This hybrid manufacturing approach bridges rapid prototyping with low-volume production, enabling makers to duplicate high-detail polymer components, flexible urethane parts, and resin castings with sub-millimeter precision.
Combining additive manufacturing with silicone tooling is one of the most cost-effective techniques for small-batch manufacturing. Rather than running a 3D printer for dozens of identical cycles, producing a single refined master pattern and casting copies in polyurethane or epoxy resin reduces production time from days to hours while delivering isotropic mechanical strength.
Essential Silicon Mould Tools for Additive Manufacturing
Executing clean silicone toolmaking requires specialized hardware to handle mixing, degassing, alignment, and demoulding. Skipping dedicated equipment frequently introduces trapped air bubbles, incomplete curing, and mould tearing during demoulding cycles.
| Tool Category | Recommended Equipment | Primary Function in 3D Printing Workflow | Critical Specification |
|---|---|---|---|
| Degassing Equipment | Vacuum chamber with 2-stage rotary vane pump | Eliminates micro-bubbles suspended in viscous silicone before curing | Ultimate vacuum: 29 inHg (approx. 75 Torr) |
| Mould Containment | Modular acrylic or melamine moulding boxes | Encloses the 3D printed master with uniform wall clearances | Wall clearance: minimum 12 mm beyond pattern perimeter |
| Registration Tools | Stepped locating core pins & registration keys | Ensures precise mechanical alignment between two-part mould halves | Tapered 10-degree draft angle for clean separation |
| Demoulding Wedges | Polyoxymethylene (POM/Delrin) pry bars | Separates silicone seams without scratching master part surfaces | Non-marring radius tips, chemical resistant |
| Surface Sealers | Polyvinyl alcohol (PVA) & acrylic lacquer barrier coats | Passivates sulphur and photoinitiator residues that cause cure inhibition | Film thickness: 15–25 microns |
Silicon Chemistry: Platinum vs. Tin-Cure Formulations
Selecting the appropriate silicone elastomer formulation determines mould longevity, tear strength, and dimensional stability:
- Addition-Cure (Platinum) Silicone: Features negligible shrinkage (<0.1%), high tear resistance (up to 30 kN/m), and long shelf life exceeding five years. However, platinum silicone is susceptible to chemical cure inhibition when in direct contact with sulphur, tin catalysts, and unreacted photoinitiators present in UV photopolymer resin 3D prints.
- Condensation-Cure (Tin) Silicone: Highly forgiving against chemical contaminants and significantly cheaper. The trade-off is measurable dimensional shrinkage (0.2%–0.6% over 48 hours) as alcohol byproducts evaporate, making it less suitable for high-precision press-fit engineering enclosures.
Overcoming Cure Inhibition from 3D Printed Masters
One of the most persistent failure modes when casting silicone over resin (SLA/DLP/MSLA) prints is “inhibition poisoning,” where the silicone layer touching the master remains sticky and fails to crosslink. This issue is triggered by residual photoinitiators (such as phosphine oxides) and unreacted monomers remaining inside the polymer matrix.
Three-Stage Decontamination Protocol
- Ultrasonic Solvent Scrub: Clean the master in 99% anhydrous isopropyl alcohol (IPA) or tripropylene glycol monomethyl ether (TPM) for 15 minutes, refreshing the bath to remove all liquid surface resin.
- High-Temperature Thermal Bake: Post-cure the print under 405nm UV light for 30 minutes, followed by a thermal bake cycle at 60°C for 2 to 4 hours in a vented oven. This completes secondary crosslinking and off-gasses volatile amines.
- Barrier Coat Passivation: Apply two fine coats of gloss acrylic lacquer or a brushed polyvinyl alcohol (PVA) parting barrier. This physically isolates the silicone platinum catalyst from the master core.
Step-by-Step Two-Part Silicone Mould Fabrication Workflow
Follow this standardized procedure to fabricate repeatable two-part silicone tooling using FDM or resin master patterns:
1. Master Pattern Preparation & Draft Inspection
Ensure the 3D model incorporates a minimum draft angle of 1° to 2° on vertical faces to prevent excessive friction during demoulding. Sand FDM layer lines progressively up to 800 grit to eliminate mechanical interlocking that can tear silicone during separation.
2. Embedding in Non-Sulphur Clay
Construct a flat baseboard and bed the master halfway into sulphur-free modelling clay (such as Chavant NSP). Smooth the parting plane with a spatula at an exact 90-degree intersection with the part wall. Press round-nosed registration detents into the clay perimeter at 40 mm intervals.
3. Degassing & Pouring the First Half
Mix platinum silicone Part A and Part B according to weight ratio (typically 1:1 or 10:1). Place the mixing container inside the vacuum chamber and evacuate until the mixture expands up to 4x its volume and collapses. Pour the degassed silicone in a continuous pencil-thin stream into the lowest point of the mould box, letting the liquid rise naturally over the part.
4. Inverting & Pouring the Mating Half
After 16 hours of full cure, invert the mould box and peel away the clay bed, leaving the master securely seated in the cured silicone. Thoroughly apply Mann Ease Release 200 or petroleum-diluted mineral spirits across all exposed cured silicone surfaces. Pour the second batch of degassed silicone to form the matching half.
Frequently Asked Questions
Can I pour platinum silicone directly onto SLA resin 3D prints?
Direct contact between standard SLA resin prints and platinum-cure silicone frequently causes cure inhibition. To ensure a complete cure, post-bake the washed resin print at 60°C for 2 hours and apply a micro-thin barrier coat of gloss acrylic or polyurethane spray before pouring.
How many polyurethane castings can a 3D printed silicone mould produce?
A well-maintained platinum silicone mould with Shore 25A to 30A hardness typically yields 25 to 50 castings with rigid polyurethane resins before styrene leaching degrades fine surface detail.
What is the ideal wall thickness for a silicone mould box?
Maintain a minimum silicone wall thickness of 12 mm to 15 mm between the outer edge of the master pattern and the inside wall of the containment box to prevent hydrostatic deformation during resin injection.
Get our latest guides, news, and insights highlighted in your Google Search & AI Overviews.