✨ This article was AI edited. Editorial responsibility: 3D-P.eu.
Produced with AI. This article was artificially generated. Editorial responsibility: 3D-P.eu.
Whether you are producing high-precision functional prototypes using fused deposition modeling (FDM) or aesthetic miniatures via stereolithography (SLA), the raw output from a 3D printer is rarely ready for immediate deployment. Layer lines, support scars, surface porosity, and dimensional tolerances require dedicated post-processing workflows. Mastering these finishing techniques bridges the gap between rough desktop prototypes and commercial-grade industrial parts.
Why Post-Processing Matters in Additive Manufacturing
In modern additive engineering, post-processing is not merely cosmetic. It accounts for up to 30% of total part production costs and directly influences the operational integrity of the component. The primary objectives include:
- Aesthetic Refinement: Eliminating the stair-stepping effect inherent to layer-by-layer extrusion to achieve an injection-molded appearance.
- Mechanical Strength Optimization: Annealing thermoplastic parts to relieve internal residual stresses and increase interlayer tensile strength.
- Fluid and Pressure Tightness: Vapor smoothing or epoxy coating to seal micro-voids between toolpaths, preventing liquid leakage in pneumatic or hydraulic housings.
- Chemical and UV Resistance: Applying specialty primers, clear coats, and ceramic composites to protect polymers from environmental degradation.
Core Post-Processing Methods by Material & Technology
Different 3D printing technologies and polymer chemistries require distinct chemical and mechanical interventions. Below is a comprehensive breakdown of standard industrial techniques:
| Method | Compatible Materials | Primary Advantage | Key Safety Caution |
|---|---|---|---|
| Progressive Wet Sanding | PLA, PETG, ABS, ASA, Resins | Precise dimensional control, smooth tactile finish | Use N95 respirator for airborne particulates |
| Acetone Vapor Smoothing | ABS, ASA only | Flawless high-gloss, airtight layer bonding | Highly flammable; requires explosion-proof ventilation |
| Ethyl Acetate Vapor | PLA | Chemical gloss without heat distortion | Toxic vapor inhalation risk; use organic vapor mask |
| Thermal Annealing | PLA, PETG, Nylon, PEEK | Increases heat deflection temperature (HDT) by up to 40% | Dimensional shrinkage along X/Y axes (approx 1-3%) |
| Epoxy Resin Glazing | All FDM filaments | Self-leveling structural shell, fills deep gaps | Exothermic curing reaction; monitor pot life |
Step-by-Step Mechanical Post-Processing Protocol
Step 1: Clean Support Removal
Support interface marks are the single largest source of surface blemishes. For break-away supports, use flush cutters with the flat edge parallel to the part surface. Avoid pulling supports perpendicular to layer lines, which can cause delamination. For soluble supports (PVA in cold water or HIPS in D-Limonene), maintain gentle bath agitation at 30°C to accelerate dissolution without softening thin structural ribs.
Step 2: Progressive Wet Sanding
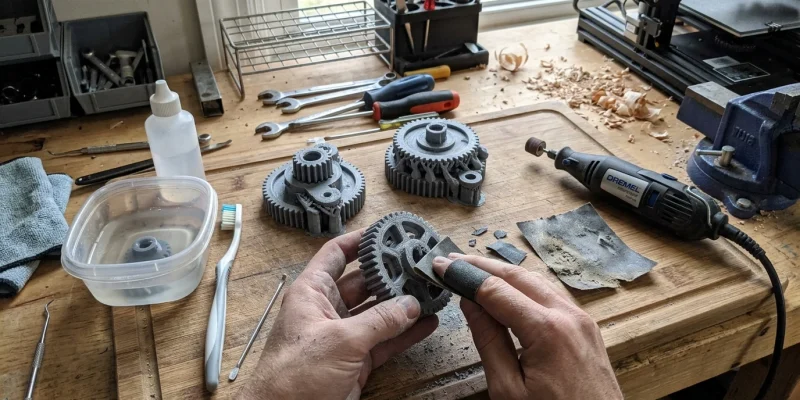
Dry sanding generates localized frictional heat that melts thermoplastic outer perimeters, resulting in gummy debris and gouges. Always employ wet sanding with silicon carbide waterproof paper:
- Initial Cut (180–240 Grit): Level seam lines and remove stubborn support nubs. Sand in circular motions using minimal downward pressure.
- Smoothing Pass (400–600 Grit): Blend transitional ridges and uniform surface texture. Keep the sandpaper and workpiece thoroughly lubricated with water and a drop of dish soap.
- Micro-Finishing (1000–2000 Grit): Prepare the polymer substrate for primer application or direct buffing.
Step 3: Gap Filling & Surface Priming
Micro-crevices between perimeter loops cannot be completely eliminated through sanding alone without altering critical dimensions. Apply high-build sandable acrylic automotive primer in light, overlapping mist coats. Allow 20 minutes of flash time between coats, followed by a light 800-grit wet sand to expose and level micro-imperfections.
Advanced Finishing: Chemical Vapor Smoothing
For ABS and ASA components, cold vapor smoothing remains the industry gold standard for achieving injection-molded clarity and tensile sealing.
The process works by suspending the print inside a sealed chamber above an acetone-soaked paper towel reservoir. Acetone vapor evaporates at room temperature, condensing on the part surface and gently dissolving the outer 0.05 mm of polymer. The surface tension of the liquefied polymer pulls high points into adjacent valleys. Removal after precisely 35–45 minutes is critical to prevent over-softening and structural collapse.
Thermal Annealing for High-Strength Functional Parts
Annealing reorganizes amorphous polymer chains into a semi-crystalline microstructure. For engineering-grade filaments:
- PLA Annealing: 80°C–90°C for 45 minutes in a convection oven, cooled slowly to room temperature.
- PETG Annealing: 95°C–105°C for 60 minutes.
- Nylon (PA6/PA12): 120°C–140°C under vacuum or packed in fine plaster powder to prevent warping.
Frequently Asked Questions
Can you vapor smooth PLA like ABS?
Standard acetone does not dissolve PLA. To chemically vapor smooth PLA, solvents such as ethyl acetate, tetrahydrofuran (THF), or specialized commercial smoothing agents (like Polymaker Polysmooth with Isopropyl Alcohol) are required. Standard PLA responds best to mechanical wet sanding and high-build primer.
How do you prevent dimensional warping during annealing?
Scale your digital CAD model slightly along the X and Y axes (typically by +1.5% to +2.5%) while reducing the Z axis (-0.5% to -1.0%) to compensate for thermal crystallization shrinkage. Additionally, packing the printed part in fine sodium chloride (salt) or refractory plaster supports thin overhangs during the heating cycle.
What is the best primer for 3D printed plastic?
Automotive 2K high-build urethane primers or standard acrylic filler primers (such as Rust-Oleum Filler Primer) provide the best adhesion and gap-filling capabilities across PLA, PETG, ABS, and UV-cured photopolymers.
Get our latest guides, news, and insights highlighted in your Google Search & AI Overviews.