
✨ This article was AI edited. Editorial responsibility: 3D-P.eu.
Produced with AI. This article was artificially generated. Editorial responsibility: 3D-P.eu.
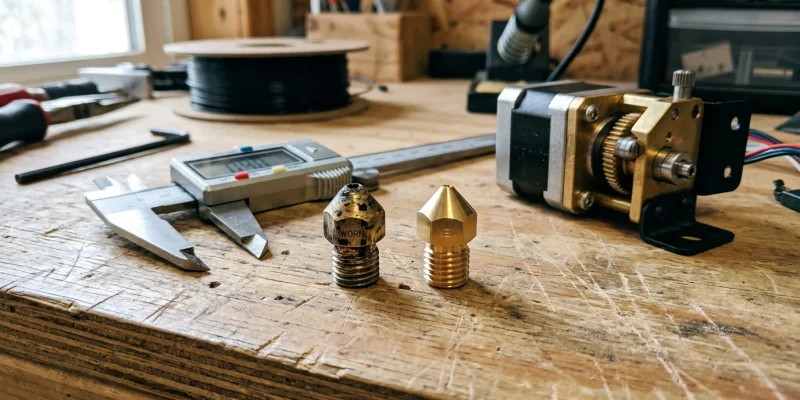
The hotend nozzle is the final, high-precision orifice through which molten polymer is metered and ironed onto your build plate. Despite being one of the least expensive components on a fused deposition modeling (FDM) machine, an eroded or deformed nozzle degrades extrusion consistency, ruins dimensional accuracy, and triggers mysterious under-extrusion. Recognizing the early mechanical signs of nozzle wear and knowing the operational lifespan of different nozzle alloys saves hundreds of hours of troubleshooting.
Nozzle Lifespan by Material & Filament Chemistry
Nozzle longevity is dictated by the hardness differential between the nozzle core alloy and the abrasive additives within the filament matrix:
| Nozzle Material | Vickers Hardness (HV) | Standard Filament Life (PLA/PETG) | Abrasive Filament Life (CF/GF/Glow) |
|---|---|---|---|
| Standard Brass (C36000) | 120–160 HV | 300–600 print hours | < 10 hours (Immediate bore erosion) |
| Plated Copper / Nickel | 500–600 HV (Coating) | 800–1,200 print hours | 50–100 hours before coating wear |
| Hardened Tool Steel (A2/D2) | 700–900 HV | 1,500–2,500+ hours | 500–1,000+ hours |
| Tungsten Carbide / Ruby Tip | 1,800–2,500 HV | 3,000+ hours (Lifetime) | 2,000+ hours without wear |
5 Unmistakable Symptoms of a Worn-Out 3D Printer Nozzle
1. Unexpected First-Layer Height Inconsistencies (Z-Offset Drift)
As the abrasive polymer rubs against the flat nozzle tip (“the land”), the metal physically wears down, making the nozzle shorter. A nozzle that has worn down by 0.15 mm will effectively increase your live Z-offset, resulting in poor first-layer squish and bed adhesion failure.
2. Severe Stringing and Oozing on Previously Tuned Profiles
Internal bore erosion rounds the sharp exit transition of the orifice. This loss of sharp geometry destroys the capillary suction required for clean retractions, causing persistent filament drooling and heavy cobweb stringing across open travels.
3. Rough, Pitted Outer Perimeter Walls
A worn or asymmetrical orifice produces an elliptical rather than cylindrical extrusion bead. As the print head changes direction, the extruded line width varies dynamically, creating mottled, rough wall textures that cannot be solved by belt tensioning.
4. Filament Curling Immediately Upon Free-Air Extrusion
When you purge filament in mid-air (cold extrude), the molten strand should drop straight down vertically. If the strand immediately curls upward and sticks to the nozzle body, there is either a severe internal burr, partial carbon clog, or asymmetric orifice damage.
5. Dimensional Inaccuracy on Small Bores and Pegs
A designated 0.40 mm nozzle that has expanded through abrasive wear to 0.52 mm will over-extrude volumetric perimeter boundaries. Holes will print undersized while external bosses print oversized, ruining press-fit tolerances.
Step-by-Step Hot Tightening Replacement Protocol
Replacing a nozzle cold will almost certainly cause molten plastic to leak between the heat break and heater block threads. Always follow the Hot Tightening Protocol:
- Preheat the Hotend: Heat the hotend to 250°C (or 285°C for all-metal setups) to thermally expand the aluminum heater block.
- Grip the Heater Block: Securely hold the heater block with channel lock pliers or a designated block wrench. Never allow the heater block to twist, as this will shear the fragile heat break tube or destroy thermistor wires.
- Unscrew the Old Nozzle: Use a 6mm or 7mm socket wrench to unscrew the old nozzle clockwise (viewed from above).
- Thread the New Nozzle & Final Hot Torque: Thread the new nozzle in by hand until it makes contact with the internal heat break. Reheat to 250°C, and apply final torque (approx 1.5 to 2.5 N·m). Verify a small visible gap remains between the nozzle hex shoulder and the heater block.
Frequently Asked Questions
Do glow-in-the-dark filaments wear out brass nozzles?
Yes. Glow-in-the-dark filament contains strontium aluminate phosphor ceramic crystals, which are significantly harder than brass. A single 200g print can enlarge a 0.4 mm brass nozzle to over 0.6 mm, ruining the nozzle.
Do hardened steel nozzles require higher print temperatures?
Yes. Hardened steel has roughly 1/3 the thermal conductivity of brass. When switching to a hardened steel nozzle, increase your nozzle temperature by 5°C to 10°C or slightly reduce maximum volumetric flow rates to maintain proper melt flow.
How do you measure nozzle wear accurately?
The most precise diagnostic method is using calibrated steel cleaning acupuncture needles or jet drill gauge pins. If a 0.45 mm pin smoothly enters a 0.40 mm nozzle orifice, the nozzle is worn beyond tolerance and must be replaced.
Get our latest guides, news, and insights highlighted in your Google Search & AI Overviews.


![How to Change Home Position on a 3D Printer? [Calibration Guide]](https://3d-p.eu/wp-content/uploads/2025/04/2637-how-to-change-home-position-on-a-3d-printer-calibration-guide.jpg "How to Change Home Position on a 3D Printer? [Calibration Guide]")

![Do I Need to Vent a 3D Printer? [Safety and Air Quality Insights]](https://3d-p.eu/wp-content/uploads/2025/04/933-do-i-need-to-vent-a-3d-printer-safety-and-air-quality-insights.jpg "Do I Need to Vent a 3D Printer? [Safety and Air Quality Insights]")
