
✨ This article was AI edited. Editorial responsibility: 3D-P.eu.
Produced with AI. This article was artificially generated. Editorial responsibility: 3D-P.eu.
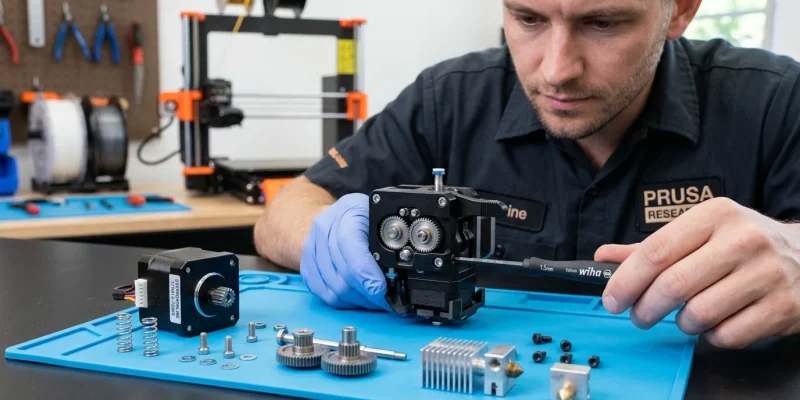
Extruder segment removing is the mechanical disassembly process of detaching the drive motor, tension idler, dual drive gears, and filament feed block from a 3D printer toolhead. This maintenance protocol is required to clear deep filament grinding jams, replace worn hardened steel drive teeth, clean debris from the heatbreak interface, or upgrade to high-torque extrusion assemblies.
The extruder mechanism represents the critical mechanical bridge between raw spool filament and the melting chamber of your 3D printer. Over hundreds of operating hours, filament dust, aggressive retractions, and heat creep can jam drive gears and seize the feed pathway. Safely removing and servicing the extruder segment without stripping miniature M2.5/M3 fasteners or snapping the delicate heatbreak requires systematic execution.
Toolhead Extrusion Architectures: Direct Drive vs. Bowden
Before unfastening mounting screws, identify your printer toolhead layout, as the mechanical disassembly steps differ substantially:
- Direct Drive Systems (e.g., Sprite, BMG, Titan, Hemera): The stepper motor and extruder gears sit directly above the heatsink. Removing the extruder segment requires dismounting the printhead carriage plate, unplugging motor harnesses, and loosening heatbreak clamping set screws.
- Bowden Remote Feeders: The extruder assembly mounts independently to the printer gantry frame. Detaching the segment requires releasing the pneumatic push-fit collet, removing the PTFE Bowden tube, and backing out mounting screws from the frame bracket.
Required Tools and Preparation Checklist
| Tool / Supply | Specification | Primary Function |
|---|---|---|
| Ball-End Hex Keys | 1.5 mm, 2.0 mm, 2.5 mm Cr-V alloy | Loosening recessed tension arm bolts and motor housing screws |
| Brass Wire Brush | Soft brass bristle, 0.1 mm wire | Clearing packed polymer shavings out of hobbed drive gear teeth |
| Thermal Grease | Boron Nitride or high-temp paste (300°C+) | Restoring thermal conductance between cold-block and heatbreak during reassembly |
| Precision Tweezers | Curved ESD-safe stainless steel | Retrieving snapped filament chunks trapped in idler channels |
| Threadlocker | Loctite 222 (Low Strength Purple) | Preventing motor mounting bolts from backing out under rapid vibration |
Safety Pre-Flight and Thermal Preparation
Attempting to remove an extruder segment while the hotend is cold when filament is stuck inside will strip the filament or break internal PTFE liner tubes.
- Preheat the Hotend: Set hotend temperature to 210°C (for PLA) or 245°C (for PETG/ABS).
- Perform a Soft Unload: Manually release the idler tension arm and gently extract the filament spool line. If the filament is snapped flush above the heatsink, allow the nozzle to cool to room temperature before mechanical disassembly.
- Power Down & Disconnect: Switch off mains power and disconnect the 24V power supply cable. Unplug the extruder stepper motor JST connector to prevent back-EMF spikes from damaging motherboard stepper drivers during manual toolhead movement.
Step-by-Step Extruder Segment Disassembly Guide
Step 1: Relieving Idler Spring Tension
Back out the thumbscrew tensioner on the extruder lever arm until spring tension is fully relaxed. Remove the tension spring and retaining cup, keeping them stored in a magnetic parts tray.
Step 2: Unfastening Motor Faceplate Fasteners
Most compact direct drive extruders share 3 to 4 M3 bolts between the plastic or aluminium housing and the NEMA 14/17 stepper motor. Loosen these bolts in a cross pattern by half-turns to maintain even pressure across internal planetary gear stages.
Step 3: Separating the Drive Gear Assembly
Carefully draw the extruder casing away from the motor shaft. Inspect the drive gear hobbing. If filament is compacted between the teeth, use the brass wire brush and a drop of isopropyl alcohol to restore sharp bite profiles. Check the miniature needle bearings supporting secondary idler gears for smooth rotation.
Step 4: Clearing Filament Obstructions
If a snapped filament strand is jammed in the feed throat between the extruder outlet and the heatsink inlet, heat the nozzle to melting temperature. Using a 1.5 mm hex wrench or brass push rod, push the remaining filament downward into the melt zone until it extrudes freely from the nozzle.
Extruder Reassembly and Torque Specifications
Reassembling the extruder segment requires strict adherence to alignment and fastener tensioning to prevent filament slippage and motor skipping:
- Gear Mesh Alignment: When seating dual-drive gears, ensure the filament grooves align precisely with the filament guide tube centerline. A misalignment of even 0.5 mm causes filament scraping and uneven extrusion rates.
- Motor Fastener Torque: Tighten M3 fasteners into motor threads to approximately 0.6–0.8 Nm. Excessive torque into aluminum stepper motor faceplates strips the soft internal threads.
- Idler Preload Calibration: After loading filament, adjust idler preload until the dual gears imprint distinct teeth notches onto the filament without flattening its circular cross-section into an oval.
Frequently Asked Questions
Why did my extruder motor gear grind through the filament instead of pushing it?
Filament grinding occurs when mechanical resistance in the hotend melt zone exceeds the torque of the extruder motor. Common culprits include a clogged nozzle, printing below the material melting temperature, or heat creep softening filament inside the heatbreak before it reaches the melt block.
How often should the extruder drive gears be cleaned?
Inspect and brush clean extruder drive gears every 200 to 300 printing hours, or immediately following any print failure involving filament grinding or nozzle clogging.
Do extruder segment mounting bolts require threadlocker?
Applying low-strength threadlocker to motor mounting bolts is recommended on direct drive printers with high acceleration rates (>5000 mm/s²) to prevent micro-vibrations from loosening the assembly.
Get our latest guides, news, and insights highlighted in your Google Search & AI Overviews.


![What Is Good Settings for a 3P 3D Printer? [Optimization Tips]](https://3d-p.eu/wp-content/uploads/2025/04/2359-what-is-good-settings-for-a-3p-3d-printer-optimization-tips.jpg "What Is Good Settings for a 3P 3D Printer? [Optimization Tips]")
