
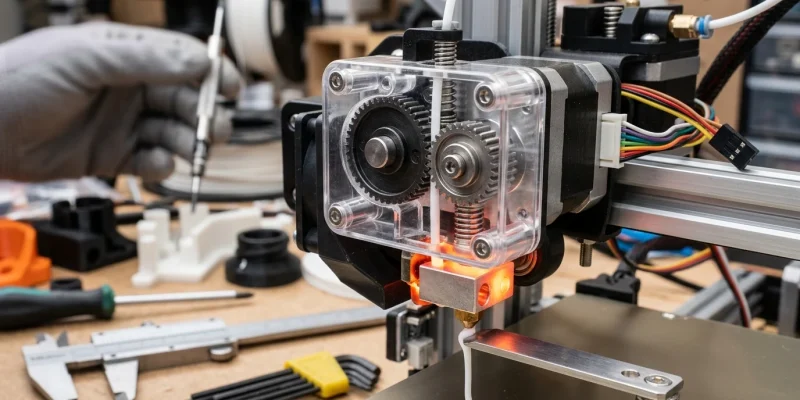
✨ This article was AI edited. Editorial responsibility: 3D-P.eu.
Extrusion inconsistency represents over 60% of all desktop 3D printing failures. Because the extrusion system links mechanical grip (feeder gears), thermal phase transition (hotend melt zone), and fluid dynamics (backpressure through a 0.4mm nozzle orifice), a defect in any single component ripples through your entire print as missing layers, spongy walls, or catastrophic spaghetti failures.
This master troubleshooting extrusion guide breaks down every failure mode across Bowden and Direct Drive systems, providing clear diagnostic matrices, calibration formulas, and permanent hardware resolutions.
Diagnostic Matrix: Identifying Your Extrusion Failure Mode
Before turning screws or disassembling your hotend, use this symptom checklist to pinpoint the exact failure mechanism:
| Extrusion Symptom | Primary Root Cause | Mechanical Location | Immediate Action Step |
|---|---|---|---|
| Rhythmic Clicking / Thumping | Backpressure exceeds motor torque; nozzle too close or clogged | Extruder Drive Gears | Increase hotend temp by 10?C; check Z-offset baby-stepping |
| Ground / Chewed Filament | Tension arm too tight or filament stuck in heatbreak | Extruder Hobbed Bolt | Release idler tension; clear stripped shavings with brass brush |
| Spongy / Brittle Infill | Partial nozzle clog or volumetric flow rate cap exceeded | Hotend Melt Zone | Execute nylon cold pull; reduce print speed in slicer |
| Extrusion Stops Mid-Print (30-45m) | Heat creep caused by failing cold-end heatsink fan | Bimetallic Heatbreak | Inspect 30mm/40mm heatsink fan RPM; re-apply thermal paste |
| Rough Top Layers & Blobs | Over-extrusion; flow rate set too high or uncalibrated E-steps | Slicer Extrusion Multiplier | Calibrate 100mm extrusion test; drop flow to 94%?96% |
1. Calibrating Extruder E-Steps (Mechanical Distance Calibration)
Extruder calibration (E-steps on Marlin or rotation_distance on Klipper) ensures that when your slicer commands 100 mm of filament, exactly 100 mm of feedstock passes through the drive gears.
The 100mm Extrusion Calibration Procedure
- Mark the Filament: Measure 120 mm from the entrance of your extruder drive inlet using precision digital calipers and mark the filament with a fine-tip permanent marker.
- Preheat the Hotend: Heat your nozzle to printing temperature (e.g., 205?C for PLA) or detach the Bowden tube to measure cold feed directly.
- Command 100mm Extrusion: Send
G1 E100 F100via terminal (Pronterface, OctoPrint, or Klipper console). - Measure Remaining Distance: Measure the distance from the extruder inlet to your mark:
- If exactly 20 mm remains: Your E-steps are mathematically perfect.
- If >20 mm remains (e.g., 27 mm): The printer extruded only 93 mm (Under-extrusion).
- If <20 mm remains (e.g., 14 mm): The printer extruded 106 mm (Over-extrusion).
- Calculate New E-Steps Formula:
New E-Steps = (Current E-Steps ? 100) / Actual Extruded DistanceSave the new value to EEPROM with
M500.
2. Clearing Partial & Complete Nozzle Clogs: The Atomic Cold Pull
When carbonized filament particles or airborne dust accumulate inside the nozzle tip, they act as an intermittent valve, causing erratic under-extrusion. The atomic cold pull is the gold-standard non-destructive clearing technique:
Step-by-Step Cold Pull Protocol
- Material: Use high-temperature Nylon (PA) or standard cleaning filament (PLA can work as a secondary fallback).
- Step 1: Heat the nozzle to 240?C and push the nylon filament firmly by hand until fresh material extrudes from the nozzle tip.
- Step 2: Turn off hotend heating and allow the block to cool completely to 90?C (for PLA) or 130?C (for Nylon).
- Step 3: At the target pull temperature, release the extruder idler clamp and pull the filament firmly and steadily upwards in one swift motion.
- Inspection: The pulled filament tip should form a perfect, conical inverse mold of the internal nozzle bore, trapping all black carbon flakes and foreign debris. Repeat until the pulled plug is pristine and translucent.
3. Overcoming Heat Creep: The Silent Extrusion Killer
Heat creep occurs when thermal energy from the heater block migrates upwards past the thin heatbreak throat into the cooling heatsink. Filament softens prematurely in the cold zone, swelling laterally and jamming against the heatbreak walls.
- Heatsink Fan Inspection: Ensure the front 4010 or 3010 cooling fan is running at 100% duty cycle whenever the hotend is above 50?C. Axial fans with worn sleeve bearings lose CFM rapidly.
- Thermal Compound Application: Apply a microscopic smear of boron nitride or high-temp CPU thermal paste to the cold-side threads of the heatbreak before screwing it into the heatsink. Never apply thermal paste to the hot side!
- Bimetallic Heatbreak Upgrade: Upgrading from a standard stainless or PTFE-lined throat to a bimetallic heatbreak (copper body with a razor-thin surgical titanium or tungsten tube) reduces thermal conduction to the heatsink by over 80%.
4. Extruder Gear Tension & Drive Train Maintenance
Mechanical wear and improper idler clamping force severely degrade extrusion consistency:
- Dual-Drive Synchronization: In dual-gear extruders (like BMG or Bondtech styles), ensure the driven slave gear meshes cleanly without grinding. Inspect gear teeth under magnification for embedded plastic dust and scrub with a stiff nylon brush.
- Idler Preload Calibration: Over-tightening the idler spring crushes round 1.75mm filament into an oval shape, creating severe friction inside Bowden tubes. Tighten the spring screw just until the drive teeth bite firmly without distorting filament geometry.
- PTFE Tube Gap: On Bowden systems, ensure the PTFE tube is cut with a razor-sharp 90? square end and pressed flush against the rear face of the nozzle. Any gap creates a molten reservoir where stagnant plastic burns and induces chronic clogs.
Frequently Asked Questions
What is the difference between under-extrusion and nozzle clogging?
Under-extrusion is a broad symptom where insufficient plastic is extruded, which can be caused by slicer settings, cold printing temperatures, or slipping gears. A nozzle clog is a physical blockage within the nozzle aperture that restricts molten flow regardless of motor torque.
Why does my 3D printer extrude fine at first, then stop after 20 minutes?
This textbook failure symptom almost always points to heat creep. As the heatsink absorbs excess thermal energy over 15 to 30 minutes, filament softens in the throat and swells, jamming the drive train.
How do I know if my extruder gears are slipping or skipping steps?
If the extruder stepper motor makes a loud, rhythmic thumping noise and you see the gear snap backwards, the motor is skipping electrical steps due to excessive backpressure. If the gear spins continuously while chewing a notch into stationary filament, the idler tension is too loose or the gear teeth are clogged with plastic dust.
Get our latest guides, news, and insights highlighted in your Google Search & AI Overviews.


