✨ This article was AI edited. Editorial responsibility: 3D-P.eu.
Produced with AI. This article was artificially generated. Editorial responsibility: 3D-P.eu.
Few experiences in 3D printing are as frustrating as reaching for the control dial mid-print?whether to tweak babystepping Z-offset, reduce feed rate, or adjust hotend temperature?only to find the LCD display completely unresponsive. The printer continues extruding along its toolpath, but the rotary knob does not register clicks, scroll through menu items, or adjust values.
This comprehensive troubleshooting guide breaks down why the Ender 3 knob becomes unresponsive during active printing, provides a step-by-step diagnostic matrix, and outlines permanent hardware and firmware remedies.
Root Causes: Why Does the Ender 3 Knob Freeze Mid-Print?
The Ender 3 control interface relies on a 12864 graphic LCD or DWIN rotary screen connected to the mainboard (Creality 4.2.2 or 4.2.7 silent board) via an EXP1/EXP3 ribbon cable. During active printing, the mainboard processor prioritizes motion planning, step generation, and thermal runaway PID loops. If any process monopolizes CPU execution cycles, user input via the rotary encoder is deferred or dropped completely.
| Failure Category | Primary Root Cause | Typical Symptom | Immediate Remediation |
|---|---|---|---|
| Processor Saturation | Buffer overload from curved toolpaths (segments > 100/sec) | Screen updates slowly; clicks register after 10?30s delay | Enable Slicer Arc Fitting (G2/G3 via ArcWelder) |
| Micro-SD I/O Blocking | Corrupted FAT32 partition or cheap stock TF card | Printer pauses or stutters; knob unresponsive | Format SanDisk Class 10 card with 4096-byte allocation |
| EMI / Ground Loops | Unshielded ribbon cable running next to stepper wiring | Random phantom beeps, garbled LCD characters, frozen encoder | Reroute ribbon cable away from 24V motor lines or add ferrite core |
| Hardware Encoder Wear | Debris, dust, or oxidized contact leaf spring inside switch | Knob clicks physically but menu does not scroll or select | Flush encoder with Quick-Drying Electronic Cleaner |
| Firmware Deadlocks | Stock Creality firmware Marlin buffer starvation | Total freeze during Babystep Z navigation | Flash modern Marlin 2.1.2.4 or Klipper firmware |
Step-by-Step Diagnostic & Resolution Protocol
Step 1: Check Micro-SD Card Health & Allocation Size
The standard micro-SD card bundled with Creality printers is notorious for low read speeds and rapid sector degradation. Marlin firmware utilizes synchronous file reads; when the card controller hangs on a corrupted cluster, the CPU blocks the user interface loop entirely.
- Immediate Test: Abort the print, backup your files, and format the SD card using the official SD Association Card Formatter utility. Select FAT32 with a 4096-byte (4KB) cluster allocation size.
- Avoid Long Filenames: Keep G-code filenames under 20 alphanumeric characters without spaces, punctuation, or special unicode characters. Deep subfolder nesting can also cause memory buffer leaks in Marlin.
- High-Speed Replacement: Upgrade to an authentic 16GB or 32GB SanDisk Ultra or Kingston Industrial microSD card (Class 10, A1/U1 rating).
Step 2: Eliminate Processor Buffer Overload via Slicer Arc Fitting
Modern slicers (PrusaSlicer, OrcaSlicer, Cura) generate hundreds of tiny linear G1 vector segments when slicing organic curves or high-poly STL models. On complex curved perimeters, the mainboard MCU is bombarded with dozens of G-code commands per millisecond. The motion buffer fills to capacity, starving the UI display loop of execution interrupts.
- OrcaSlicer / PrusaSlicer: Navigate to Print Settings > Advanced > Slicing and enable Arc Fitting (generates G2/G3 arc commands instead of linear G1 segments). This reduces G-code line count by up to 70% and frees up substantial MCU clock cycles.
- UltiMaker Cura: Install the free ArcWelder plugin from the Cura Marketplace, which automatically post-processes linear curves into smooth native G2/G3 arcs.
- Reduce Mesh Resolution: In your CAD export settings, avoid excessively dense polygon meshes where curve chordal tolerance is set below 0.005 mm.
Step 3: Shield and Reroute the LCD Ribbon Cable (EMI Mitigation)
The 10-conductor gray ribbon cable that connects the Ender 3 mainboard to the LCD screen carries low-voltage digital signals (SPI / I2C). In the stock cable routing, this ribbon runs in direct proximity to the Y-axis stepper motor, the 24V bed heater power lines, and the chassis extrusion.
When the high-current heated bed pulses via PWM (pulse-width modulation) or the stepper motor switches rapidly, electromagnetic interference induces noise spikes on the encoder pin lines. This noise manifests as frozen menus, missed encoder detents, or spontaneous squeaks.
- Rerouting: Detach the ribbon cable from the main cable bundle and route it through the outer frame channel, away from the power supply and heated bed wires.
- Ferrite Bead: Snap a snap-on ferrite core (RFI filter) around the ribbon cable near the mainboard enclosure.
- Insulate LCD Bracket: The metal LCD mounting bracket touches the aluminum 4040 extrusion. Place small electrical tape squares between the bracket and the frame screws to break ground potential differences.
Step 4: Clean or Replace the Rotary Encoder Switch
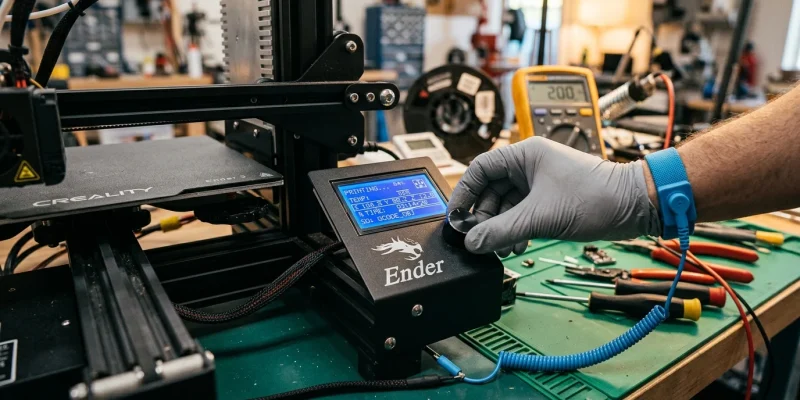
If the display updates smoothly but turning or pressing the knob fails to register input, the mechanical switch itself may be contaminated or physically fatigued. The encoder relies on two internal metal wiper springs that slide across conductive pads to generate quadrature pulses.
- Cleaning: Power down the printer completely. Spray a 2-second burst of CRC QD Electronic Cleaner or 99% isopropyl alcohol directly down the rotary shaft beneath the knob cap. Rapidly spin and click the dial 40 times to dislodge dust and carbon buildup, then allow 10 minutes to dry before powering on.
- Encoder Knobs Clearance: Check if an aftermarket 3D-printed dial knob is rubbing against the metal casing or LCD front bezel, physically impeding the push-switch stroke.
Advanced Solution: Upgrading Firmware to Marlin 2.1.x or Klipper
Stock Creality firmware (especially on older 4.2.2 boards with GD32 or STM32F103 microcontrollers) has conservative buffer sizes and legacy display timings. Compiling a modern, optimized firmware build eliminates UI lag permanently.
- Marlin 2.1.x Optimizations: In
Configuration_adv.h, enableENCODER_RATE_MULTIPLIERto accelerate menu scrolling, and enableBABYSTEP_ZPROBE_OFFSETwith graphical overlay for zero-lag live leveling. - Klipper Migration: Migrating your Ender 3 to Klipper (running on a Raspberry Pi or old laptop) offloads all trajectory calculations, G-code parsing, and kinematics to a quad-core processor. The Ender 3 screen or a modern web UI (Fluidd / Mainsail) remains silky smooth regardless of print speed or complex geometry.
Frequently Asked Questions
Can I stop a print safely if the knob is not responding?
If the printer is behaving erratically and the knob is unresponsive, do not abruptly yank the power plug unless there is an immediate thermal or mechanical hazard, as abrupt power loss leaves the hot nozzle resting on your print. If connected via OctoPrint or Pronterface, send an M112 emergency stop. Otherwise, flick the power rocker switch and immediately manually push the X-gantry away from the bed.
Why does the knob click work but rotating does nothing?
This typically indicates that the rotational quadrature pins (Encoder A or Encoder B) are disconnected, shorted by EMI, or worn out, while the central push-button contact remains functional. Inspect the ribbon cable solder joints on the rear of the LCD PCB for cracked traces or cold solder joints.
Does printing over USB via OctoPrint eliminate knob lag?
Yes. Printing via serial stream from OctoPrint bypasses the slow onboard SD card read routines. However, ensure your serial communication baud rate is configured to 250,000 baud to prevent serial buffer underruns.
Get our latest guides, news, and insights highlighted in your Google Search & AI Overviews.